Journal
How to Verify a Water Well Donation: A 6-Step Method
How to verify a water well donation in six steps: check the plaque, the GPS point, the stage photos, the water test and the price before you give.
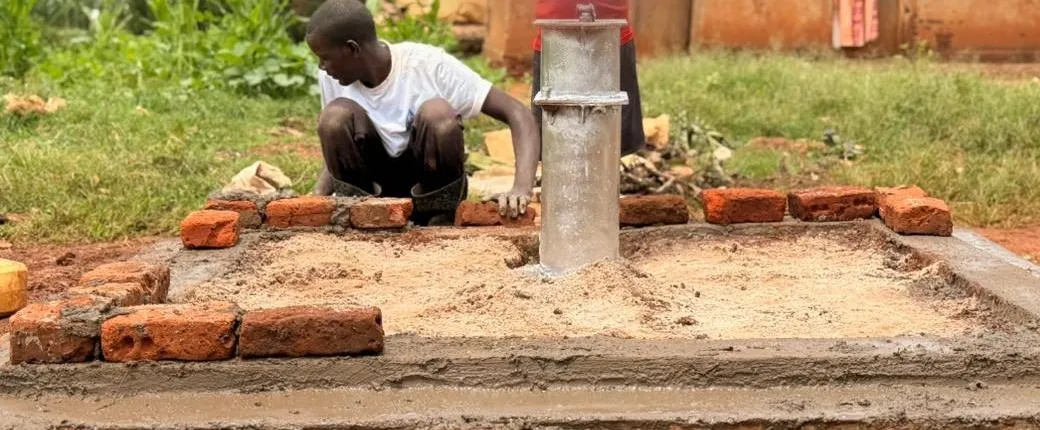
To verify a water well donation, check that the evidence points to one specific well: your chosen name on the plaque, an exact GPS location you can find on a satellite map, stage photos of the same site, a water test at handover and a handover report. If these pieces agree, the well is real.
Verification is not about suspicion. It is about knowing where your money went, the same way you would check a builder's work on your own home. Honest providers welcome it, because a donor who has checked once tends to trust what follows.
This guide gives you a six-step method you can apply to any well project, before you pay and after the proof arrives. It works whether you give with Blue & Green Hope or elsewhere.
Why should you verify a water well donation?
You should verify a water well donation because the gift happens far away, and you cannot see the work with your own eyes. Most providers are honest, but the quality of proof varies a great deal. Some send a full record of the work. Others send one photo and a certificate.
Verifying also helps you choose well next time. Once you know what good evidence looks like, you can compare providers on what they actually deliver, not on how their adverts feel. That is a calmer and fairer way to give.
There is a practical side too. Many donors put the name of a parent or grandparent on the plaque. Seeing that name in place, on the right well, at the right location, matters to families. A clear method lets you confirm it without needing to travel.
If you are new to the subject, our complete guide to water well donation proof explains each type of evidence before you start checking.
Step 1: Ask what proof you will receive before you pay
The first check happens before any money moves. Ask the provider to list, in writing, what you will receive and when. A clear answer is a good sign. A vague one, such as 'you will get updates', is worth a follow-up question.
For a Blue & Green Hope family hand-pump well in Uganda, the list is fixed and public:
- Photos and video of the stages of the work.
- The exact GPS location of the well.
- The name on the plaque, up to 30 characters.
- A lab water test at handover.
- A handover report, sent by email as a permanent gallery link.
- All within 3 to 5 weeks of payment.
Our how we verify page sets out the same method, so you can compare it with what other providers promise.
Step 2: Check the plaque and the name
The plaque is the simplest link between your gift and one well. Look for your chosen name in the photos, spelled as you gave it. If the plaque is blurred, cropped out or missing, ask why.
Look at the plaque in more than one photo if you can. A name that appears in the finished well photos and again in the handover report is much stronger than a name that appears only once. The plaque should sit on the well structure itself, not on a board that could be moved from site to site.
Is my well real if the name is right but nothing else matches? Not necessarily. The plaque is one piece. It becomes convincing when the GPS point and the stage photos describe the same place, which is what the next steps check.
Step 3: Find the GPS point on a satellite map
Copy the coordinates from your report and paste them into a free satellite map. You should land on a real place with homes, paths or fields nearby. A point in the middle of a lake, a city centre or another country is a clear problem.
Do not expect to see the well itself. Satellite images are often months or years old, and a hand-pump well is small from above. What you are checking is that the surroundings match the photos: the kind of land, the trees, the layout of the homestead.
Our step-by-step guide to finding your well on a satellite map shows exactly where to paste the numbers and how to read what you see.
Step 4: Read the stage photos and video
Stage photos tell the story of one site over several weeks. Read them in order. The ground, the trees and the buildings in the background should stay the same from the first dig to the finished apron. The light and the season should change only a little.
Video adds something photos cannot: movement and sound. A short clip of the pump being used, with water flowing, is hard to stage. It also shows you the well at a human scale, which a still image sometimes hides.
- Same background across the stages.
- The plaque visible on the finished well.
- Water coming from the pump in the video.
- Photos that look like fieldwork, not a polished advert.
For more on what a good set looks like, read our guide to the photos and video you should receive.
Step 5: Look for the water test and the handover report
A well is only useful if the water is fit to drink. A lab water test at handover checks that before the family starts using it. The result should appear in the handover report, in plain words you can read.
The handover report is where everything comes together: the site, the GPS location, the plaque, the water test and the photos. It marks the moment the well is handed over to the family who will use it every day. If a provider cannot send a report like this, the rest of the proof is harder to trust.
Treat the report as a record, not a thank-you note. It should be specific to your well, and it should agree with the photos and the map.
Step 6: Check the price and where the money goes
The price is part of verification. A family hand-pump well in Uganda costs £560 with Blue & Green Hope, and every pound is itemised on our transparency page. If you live outside the UK, the price is shown in your own currency on the site.
An itemised price lets you see what the money pays for, and whether the figure is realistic for the work described. In parts of East Africa, water is often 50 to 80 metres down in hard ground, and reaching it has a real cost. If you are comparing prices from different countries, our guide to what a water well costs in dollars puts the figures side by side.
A price far below the others is not proof of a scam, but it is a reason to ask what is included.
Questions people ask
Can I check a water well charity before donating?
Yes. Ask for the list of proof you will receive, the lead time and a breakdown of the price. Look for examples of past reports if they are published. A provider that answers these questions clearly, in writing, before you pay is usually one that will send good proof afterwards.
What if the GPS point does not match the photos?
Write to the provider and ask. Sometimes a coordinate is copied with a typing error, or the satellite image is very old. A good provider will explain and correct it quickly. If you get no clear answer, treat that as a warning sign for future gifts.
Do I need special software to verify my well?
No. A free satellite map in your browser is enough to check the GPS point. The photos, video and handover report from Blue & Green Hope arrive by email as a permanent gallery link, so you only need a phone or a computer.
How long after donating can I verify my well?
With Blue & Green Hope, the handover report and the full set of photos and video reach you 3 to 5 weeks after payment. You can start your checks as soon as the email arrives, and the gallery link stays available for you to return to.
Where to start
Start with one question before you give: what proof will I receive? Then, when it arrives, check the plaque, the map, the photos, the water test and the price in that order. It takes less than half an hour. If you would like to see how we answer that first question, our family hand-pump well page sets it out in full, whenever you are ready.
Keep reading
Water Well Donation Proof: The Complete Guide for Donors
Water well donation proof explained: the photos, video, GPS location and handover report you should receive, and how to check each one yourself.
Check Water Well on Map: Find Your Well From Its GPS Point
Check water well on map in minutes: paste the GPS location from your report into a free satellite map, read the surroundings and know what to expect.
Best Times to Give Sadaqah: A Year-Round Islamic Calendar
The best times to give sadaqah across the Islamic year, from Ramadan 2027 to Dhul Hijjah and family milestones, with a calm plan for sadaqah jariyah.